Effective Ways to Create Labels in Word for Your Current Projects in 2025
Creating professional-looking labels can significantly enhance your projects, be it for personal use, marketing, or gifting. In 2025, the need for effective **labels in Word** has never been more important. With several advanced label making features, **Microsoft Word** continues to be a user-friendly choice for designing and printing labels. In this article, we’ll guide you through the process of **creating labels in Word** using various techniques and tips, ensuring you can effectively use this tool for all your labeling needs.
Understanding the Basics of Using Word for Labels
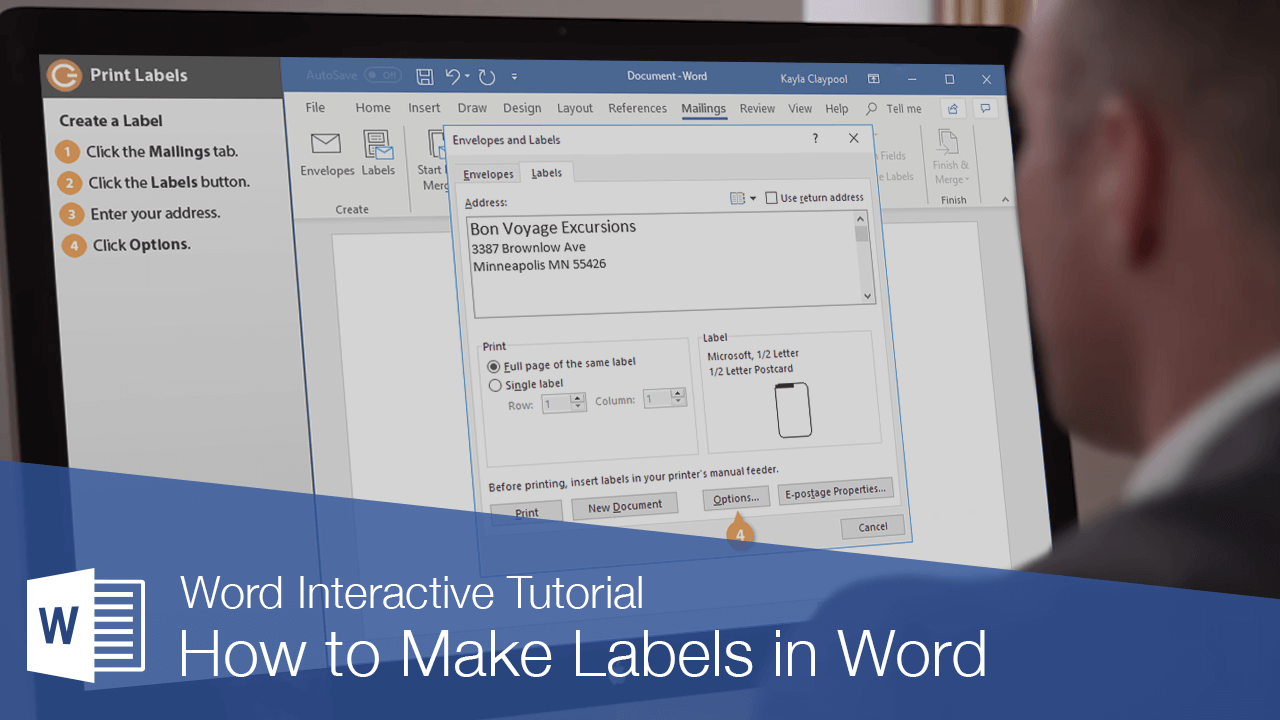
When it comes to **designing labels in Word**, having a solid grasp of the basics is crucial. Understanding how to navigate the **label options in Word** can vastly improve your experience. Word offers several pre-designed **label templates in Word**, and using these can simplify your labeling tasks. You can access these templates directly within the Word application by searching for “labels” in the template section. Once you have selected your template, **insert labels in Word** by choosing the appropriate size and layout that matches your project needs.
Choosing the Right Label Templates in Word
Selecting the right label template is vital for your project’s success. Word provides a variety of **label layout in Word**, ensuring that your labels fit the desired dimensions. **Word document labels** can range from simple address labels to more complex descriptive labels. The key is to select a template that suits your needs — whether you are making **custom labels in Word** for products, mailing, or gifts. For instance, pre-formatted templates for **address labels** can save considerable time, allowing you to focus more on design and content.
Formatting Your Labels in Word
Once you’ve chosen a template, the next step in **making labels in Word** is **formatting labels in Word**. You’ll want to adjust fonts, colors, and alignment to ensure readability and visual appeal. Utilizing **label text formatting in Word**, you can also add graphics, such as logos or images, to make the label more eye-catching. Remember to maintain proper contrast between text and background colors for optimal visibility. Additionally, double-check your **label sizes guide in Word** to ensure that fonts and images don’t exceed the label’s borders, which could result in poor printing quality.
Advanced Techniques for Printing Labels in Word
For those looking to take their labeling skills to the next level, **advanced label making in Word** techniques are essential. Understanding how to use **Word mail merge labels** can dramatically increase efficiency, especially if you’re printing a large set of labels. This process allows you to automatically populate information into each label without having to create them individually, saving you both time and resources.
Utilizing Mail Merge for Efficiency
To create **address labels** using the mail merge feature, begin by preparing a data source such as a spreadsheet that contains all the addresses necessary for your labels. Open Word and navigate to the **mailings** tab, select **start mail merge**, then click **labels**. Choose your label type and link to your spreadsheet. By following these steps, you can streamline your label creation process while maintaining consistency in your design by using the same template. Each label will now automatically pull the corresponding data from your spreadsheet, allowing you to produce several labels instantaneously.
Achieving Custom Label Designs
Creating eye-catching custom labels in Word can significantly benefit your projects, especially in product packaging or marketing materials. Using the Picture Tools format options, you can easily customize colors, styles, and effects. It’s advisable to experiment with **label styles in Word** to design labels that stand out. Another tip is to incorporate unique shapes and sizes, which can be adjusted in the **custom dimensions in Word** section, giving you added flexibility in your designs. Additionally, consider having a consistent branding theme across all your labels for a professional look.
Practical Tips for Label Management
Efficient management of your labels is crucial to maintaining organization within your projects. **Managing labels in Word** goes beyond simple creation — it involves ongoing adjustments and retouching based on evolving requirements. Utilizing tools such as bookmarking, templates, and quick parts can make it easier for you to keep your label designs up to date without starting from scratch each time.
Creating and Saving Custom Templates
One effective strategy is to **create mailing labels in Word**. Once you have formatted a label to your liking, save it as a custom template for future use. Go to the “File” tab, select “Save As,” and choose the template option. This saves not only time but also maintains consistency in your branding and design. Whenever you need to print **custom labels in Word**, simply open the saved template, and you can add new details quickly and efficiently.
Tips for Printing Labels in Bulk
When it comes to **printing labels in Word**, you want to ensure that everything runs smoothly, especially if you’re preparing for large distributions. Check your printer settings, making sure you have selected the correct paper size and type that matches your labels. It’s also wise to perform a test print on plain paper first to ensure positioning is accurate. This extra step will save you valuable resources by preventing misprints. Lastly, always keep extra label sheets on hand to avoid last-minute rush orders.
Key Takeaways
- Choose and customize the right **label templates in Word** for your projects.
- Use **advanced techniques** like mail merge for efficiency when printing multiple labels.
- Keep your labels organized by saving custom templates for different projects.
- Test before printing to ensure optimal alignment and print quality.
FAQ
1. What are the steps for **printing custom labels in Word**?
To print **custom labels in Word**, start by designing your label layout. Use the **label options in Word** to select the size you need, then format your labels with the necessary text and images. Save your design as a template for future use. Before printing, verify the printer settings match your label dimensions. Run a test print to ensure proper alignment, and then print your labels as needed.
2. Can I use **Word for address labels**, and how does it work?
Yes, you can certainly use Word for address labels. By accessing the **mailings** tab, you can choose to create labels based on a data source, like a contact list. This feature allows for quick and bulk creation of **address labels using Word** mail merge, making it perfect for event invitations, shipping, or personal correspondence. Just ensure your data is formatted correctly in a spreadsheet to facilitate smooth merging.
3. Are there **templates for craft labels in Word** available online?
Yes, you can find numerous free **label templates in Word** online, catering to various craft projects. Websites dedicated to templates often offer options you can customize to fit your creative needs. Simply download the template, open it in Word, and begin the design process to suit your project.
4. What features are available for **label text formatting in Word**?
When formatting text in your labels, Word allows you to adjust font size, style, color, and effects. You can also apply shadows or outlines to enhance visibility. Utilize these formatting features to make your **labels in Word** both visually appealing and professional.
5. How do I troubleshoot issues when **using Word for labels**?
If you encounter issues while **using Word for labels**, double-check your label size settings and printer compatibility. Ensure that your printer supports the label material you are using. Additionally, testing alignment with plain paper before printing directly on labels can help prevent waste and frustration. Should issues persist, consulting the Word help section can provide tailored solutions.
6. What is the best practice for **label alignment in Word**?
To achieve optimal **label alignment in Word**, always set your margin settings to zero or adjust them according to your label sheet specifications. Use gridlines to help with placement and ensure that text stays within the designated label area for more accurate printing. Testing the printed alignment on plain paper before proceeding with labels is highly recommended for perfect results.